Much Abrew About Nothing: Modern Free Win Red
Hello everyone! It's time for another edition of Much Abrew About Nothing. This time we are playing a deck that I've been using to crush Modern queues on Magic Online: Free Win Red. I'd been toying with the idea of building an All In Red deck for a while. I firmly believe Blood Moon and Ensnaring Bridge are two of the most broken cards in Modern, and I'm super glad I finally got around to giving it a try because the deck is awesome. So far I'm something like 10-1 on Magic Online, with my only loss coming to 8 Rack, which is admittedly a horrible matchup, but one we shouldn't run into very often.
We'll break down the deck after the videos, but first a quick reminder. If you enjoy Much Abrew About Nothing and other video content on MTGGoldfish, subscribe to the MTGGoldfish Youtube Channel to keep up on all the latest and greatest.
Free Win Red Intro
Free Win Red vs UW Emeria
Free Win Red vs BW Tokens
Free Win Red vs Bloodghast Leap
Free Win Red vs Jund
Free Win Red vs Kiki-Chord

The Deck
First off, this deck is awesome. I haven't had this much fun playing Modern since I was enthralled by Rallyzenza a few months ago. Basically, one day I realized half of Modern can't beat a Blood Moon and the other half can't beat Ensnaring Bridge. Instead of durdling with other cards, why not take a page from the All In Red playbook and focus on getting those cards on the battlefield as quickly as possible? Sometimes, just for fun, we get to play a turn one Chandra, Pyromaster or Koth of the Hammer, which are not as game ending as Blood Moon, but still generate a massive advantage when they are on the battlefield. All in all, the idea is to end the game on turn one with one huge spell, even if it takes us a few turns to officially end the game.


Blood Moon is the most important card in our deck. So important that we play three copies of Magus of the Moon even though it dies to Lightning Bolt, Path to Exile, and every other removal spell in the format. Most deck that run Blood Moon in Modern play it out of the sideboard, and the few that play it in the main deck don't plan on getting it to the battlefield until turn three. The entire idea of our deck is to get a Blood Moon on the battlefield on turn one. While the difference between turn three and turn one might not sound like much, it's huge. A resolved Blood Moon on turn one means that our opponents can't use their fetchlands to find basics over the first couple turns, making the lock much harder. This is especially important in games two and three, when our opponent knows what's coming and makes fetching basic lands a priority.
If you look at the Top 10 decks in Modern, the power of Blood Moon is clear. Discounting Affinity, Twin, and Merfolk, the average deck plays only 2.5 basic lands. When we resolve a Blood Moon on turn one, the odds are in our favor of our opponent never drawing a basic land.
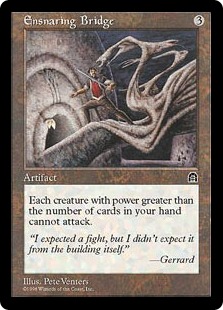
So what about the decks like Merfolk, Twin, and Affinity that don't scoop to Blood Moon? This is where Ensnaring Bridge comes in. Apart from Cryptic Command in Twin, none of those decks have a main deck way to answer an Ensnaring Bridge. These decks only have a limited number of answers post-board. Some Merfolk decks don't even have a sideboard answer. Ensnaring Bridge is a good insurance policy against decks that struggle to beat Blood Moon, making sure any creatures that happen to slip through the cracks can't attack us or the planeswalkers we control.


Chandra, Pyromaster and Koth of the Hammer are our payoff cards. While we sometimes play them as early as turn one, most of the time they come down later and help us close out the game. Chandra, Pyromaster is a card advantage machine that works amazingly well with Ensnaring Bridge since she exiles cards, meaning our hand won't get cluttered up with spells we can't cast. She also allows us to pick off any small, annoying creature and ping our opponent to death.
Koth of the Hammer is our finisher. While we sometimes get in damage with animated Mountains, most of the time this dosen't work since Ensnaring Bridge is symmetrical. Instead, we rely on Koth of the Hammer's ultimate to close out the game. While he doesn't defend himself very well, the best aspect of Koth of the Hammer is that he reaches his ultimate quickly. It only takes two turns, and the ultimate is basically unbeatable and finishes the game in short order.
It is true we don't often close out games quickly, but this aspect is a side-effect of being so reliant on Ensnaring Bridge. While I thought about including a couple of Stormbreath Dragons or Thunderbreak Regents, they fare poorly with Ensnaring Bridge on the battlefield. It does take us awhile to get our opponent's life total to zero, but most of the time our lock is hard enough that it doesn't matter.


This is the group of cards that makes Free Win Red so explosive. Each of these cards is +1 red mana, and one of these paired with Simian Spirit Guide allows us to play a Magus of the Moon or Blood Moon on turn one. Things get crazy when we have three of these cards in our opening hand, since we have four mana to play a turn one planeswalker.
The other benefit of these cards is they allow us to empty our hand very quickly. Our Ensnaring Bridge is usually fully powered by turn three. While they are pretty poor top decks in the late game, this doesn't usually matter. The advantage these cards generate in the early game is significant enough that we can deal with some poor draws in the late game. Remember, all of these cards can be played at instant speed, and it's perfectly acceptable to cast them for no value if you need to get to fewer cards in hand for Ensnaring Bridge.


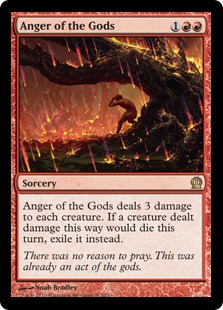

The rest of the deck is self-explanatory. Lighting Bolt and Magma Jet help us keep the board clean while we get Ensnaring Bridge online. They can also help us close out the game. Magma Jet is particularly good in the deck, since apart from Chandra, Pyromaster's 0 ability, we don't have any card advantage. We can use the scry 2 ability to push a couple of lands to the bottom of the deck or dig for a lock piece. Anger of the Gods helps against decks like Affinity, especially in games where we don't have an Ensnaring Bridge. Since we don't have many creatures, it's often a one-sided board wipe.
Finally, Relic of Progenitus is the 59th and 60th card and these two slots should be considered up for grabs. Since I didn't have anything else I really wanted, I figured I would give Relic of Progenitus a try. In the worst case it cycles. That said, I've been pleasantly surprised by the artifact's power. It is relevant in a ton of matchups, from Tarmogoyf decks to Snapcaster Mage decks to combo decks like Grishoalbrand. I plan on leaving the Relics in, but if you want to experiment with these slots, go for it.
The Sideboard


The nightmare scenario for Free Win Red is to run into a deck that doesn't care about Blood Moon or Ensnaring Bridge. There is one tier one deck in Modern that fits this description: Burn. Burn is the one matchup where I feel like a significant underdog. My solution has been to run a full playset of Dragon's Claw in the sideboard, which is fairly effective, but not always game winning. Our deck takes so long to close out the game that even a two damage Lightning Bolt will get the job done eventually.
The other option for beating Burn is Chalice of the Void. I'm honestly not sure which of the two is better. Chalice of the Void is a harder lock against Burn and not horrible in some other matchups (like Delver). It's devastating on turn one, but I haven't really tested it much yet. If Burn ends up being too big of a problem, running some number of Chalice of the Voids alongside the set of Dragon's Claws is the way to go.
The rest of the sideboard is built to shore up specific matchups. Vandalblast is great against Affinity, a matchup that becomes harder after sideboarding since they typically have multiple copies of Ancient Grudge to deal with Ensnaring Bridge. Rending Volley helps against the Twin combo, which doesn't care all that much about Blood Moon and sometimes has access to Kolaghan's Command. Finally, Roast is an answer to big creatures like Tarmogoyf, which are pretty difficult to burn out.
The Downside
This is usually where I talk about good and bad matchups. Apart from the Burn matchup we just discussed, I don't feel that any major matchup is truly bad. Blood Moon and Ensnaring Bridge attack Modern on such a primal level that, when things go well, most of the decks in the format struggle. The deck does lose to itself some percentage of the time. As I'm sure you noticed in the videos, we expend a lot of resources to resolve an early threat. If our opponent has an answer to the threat we've two- or three-for-one'd ourselves. For instance, during one game against UW Emeria, we played a turn one Chandra, Pyromaster and our opponent calmly untapped and played a sideboarded Celestial Purge. Sometimes this card disadvantage doesn't matter because Blood Moon and Ensnaring Bridge are just so good. Basically, we don't lose to our opponent's decks very often, but we do lose to the inherent nature of our deck.
Conclusion
I have a ridiculous 90% match win percentage with this deck since putting it together. While I expect this number to come back to earth (the sample size is fairly small), I think this deck is very well positioned in Modern. As the name suggests, Free Win Red picks up a large number of free wins, which means we don't have to win many fair games of Magic to put up a really good record. I would take this deck to a Grand Prix or SCG Open without a question. It's not only powerful, but, at least for me, incredibly fun to play.
I'm sure there are room for improvements, so please leave your ideas and suggestions in the comments. I plan on sticking with this one for a while, so I would like to make the list as streamlined as possible.
Anyway, that's all for today. Leave your thoughts, ideas, opinions, and suggestions in the comments. You can reach me on Twitter (or MTGO) @SaffronOlive.